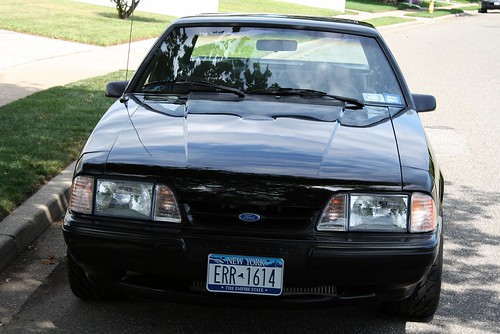
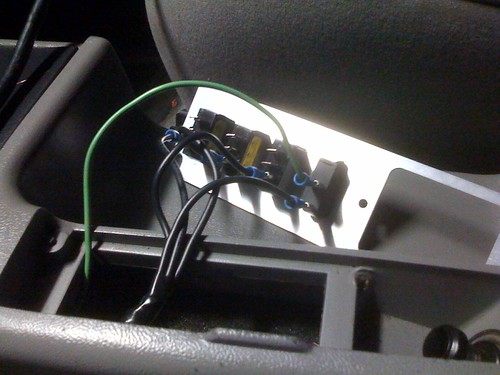
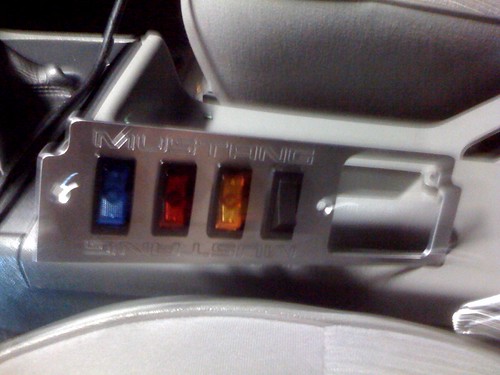
Here are some pics from a few weeks ago when she was all cleaned up. The stang looks a lot better via photos then in person, but hey… What do you expect for 23+ year old paint?!?! Other pics are for the new switch console I added to the ashtray. These switches control my Fan, Shift Light, and gauges. Heading to Englishtown,NJ this weekend for the big Muscle Mustang & Fast Fords Event. More info on the event here: http://www.etownraceway.com/schedule/fords.aspx It should be fun!


Some pics of the control panel installed in the ashtray, sorry crappy pics, took it with my iPhone.


Just a quick tip for when you are doing nested resources….
In this example, I am building a app for a client where there is a recipient and they have many physicians. So I have a case where I have a nested resource. To keep thing DRY, I added this to my before filter where I get the recipient. This allows you to nuke the find in the show, edit, update and delete actions and retain the original use of @physician.
def get_recipient
  @recipient = Recipient.find(params[:recipient_id])
  # DRYs her up a little so you don't have a find in the show,edit,update and delete actions
  @physician = @recipient.physicians.find(params[:id]) if params[:id]
end
Don’t forget to modify your index find, change it to reflect the nested route… In my case:
@physicians = @recipient.physicians.find(:all)
Have any other useful tips? Let me know!
This tutorial is an extension of the paperclip tutorial I put up last week. This time we are going to take advantage of polymorphic paperclip. Polymorphic paperclip utilizes separate tables (an assets table and an attachings table) to track your attachments. This allows for an unlimited number of attachments per item per model. In the first tutorial I showed you how to attach just one item, although you could add more columns to your table to handle additional attachments this way is a lot more flexible. While this plugin is not perfect, there is a lot of room for improvement, its a great starting point. Perhaps a fork is on its way from me…
Project Page: http://github.com/heavysixer/paperclippolymorph/tree/master
First things first, lets install the plugin:
script/plugin git://github.com/heavysixer/paperclippolymorph.git |
script/plugin git://github.com/heavysixer/paperclippolymorph.git
Lets setup our new migration that is needed. After reading the rdoc, I noticed there was a new generator installed. Great, this makes things even easier. Lets verify that the generator is available for use, first run:
This should produce a list of all generators available for use, my list below might vary from yours depending upon what plugins you have installed…
Installed Generators
  Plugins (vendor/plugins): authenticated, forgot_password, open_id_authentication_tables, paperclip, polymorphic_paperclip, roles, rspec, rspec_controller, rspec_model, rspec_scaffold, upgrade_open_id_authentication_tables
Builtin: controller, integration_test, mailer, migration, model, observer, plugin, resource, scaffold, session_migration |
Installed Generators
Plugins (vendor/plugins): authenticated, forgot_password, open_id_authentication_tables, paperclip, polymorphic_paperclip, roles, rspec, rspec_controller, rspec_model, rspec_scaffold, upgrade_open_id_authentication_tables
Builtin: controller, integration_test, mailer, migration, model, observer, plugin, resource, scaffold, session_migration
As you will notice there is a polymorphic_paperclip generator, go ahead an run it as follows:
script/generate polymorphic_paperclip |
script/generate polymorphic_paperclip
Before you go and run rake db:migrate, open up the migration and modify the assets_count to attachings_count – it seems there is a minor bug. I notified the author of the plugin and will submit a patch via git. Now its OK to run rake db:migrate
Now we have the migration generated and the tables have been added to your database. Next we have to add (or change if you already have paperclip setup) the model where you want to have attachments by adding acts_as_polymorphic_paperclip. As an example, I posted my documents model below.
class Document < ActiveRecord::Base
# Document Belongs To A User
belongs_to :user
# for paperclip (polymorphic)
acts_as_polymorphic_paperclip
# Validations
... |
class Document < ActiveRecord::Base
# Document Belongs To A User
belongs_to :user
# for paperclip (polymorphic)
acts_as_polymorphic_paperclip
# Validations
...
Note: Ideally I would like to be able to override the styles settings that are set in the plugins assets.rb, however I went ahead and hard coded them there to fit my needs. Example:
class Asset < ActiveRecord::Base
  has_many :attachings, :dependent => :destroy
  has_attached_file :data,
                    :styles => {
                    :thumb=> "100x100#",
                    :small  => "150x150>",
                    :medium => "300x300>",
                    :large =>   "500x500>",
                    :xlarge =>   "600x600>",
:xxlarge => "800x800>" } |
class Asset < ActiveRecord::Base
has_many :attachings, :dependent => :destroy
has_attached_file :data,
:styles => {
:thumb=> "100x100#",
:small => "150x150>",
:medium => "300x300>",
:large => "500x500>",
:xlarge => "600x600>",
:xxlarge => "800x800>" }
For now, lets move onto the views where you are going to allow attachments. We are just going to have one upload, perhaps in another tutorial we will look at handling multiple uploads.
You need to make sure you put the html => { :multipart => true } in both your edit and new views for the model you are working with. Example in my case:
<% form_for(@document,:html => { :multipart => true }) do |f| %>
  <%= f.error_messages %>
  <%= render :partial => 'form', :locals => { :f => f } %>
<% end %> |
<% form_for(@document,:html => { :multipart => true }) do |f| %>
<%= f.error_messages %>
<%= render :partial => 'form', :locals => { :f => f } %>
<% end %>
Next you need to add the file upload field to your _form or edit/new views.
<p>
  Attach a file or image <br />
  <%= f.file_field :data%>
</p> |
<p>
Attach a file or image <br />
<%= f.file_field :data%>
</p>
Now lets go ahead and make these attachments viewable in the document. For the edit view I added the following:
<p><%= image_tag asset.url(:medium) %></p>
<p>Tiny:  <%= asset.url(:tiny) %><br />
 Small:  <%= asset.url(:small)%><br />
 Medium:  <%= asset.url(:medium)%><br />
 Large:  <%= asset.url(:large)%><br />
 XL:  <%= asset.url(:xlarge)%><br />
 XXL:  <%= asset.url(:xxlarge)%><br />
 Original:  <%= asset.url %>
</p> |
<p><%= image_tag asset.url(:medium) %></p>
<p>Tiny: <%= asset.url(:tiny) %><br />
Small: <%= asset.url(:small)%><br />
Medium: <%= asset.url(:medium)%><br />
Large: <%= asset.url(:large)%><br />
XL: <%= asset.url(:xlarge)%><br />
XXL: <%= asset.url(:xxlarge)%><br />
Original: <%= asset.url %>
</p>
Other Notes:
You can use this to attach an attachment if you were going to use a different view, for example an upload view with @document.assets.attach(@asset)
You can nuke an attachment by either calling @document.assets.detach or @document.assets.detach(@asset) depending upon how you are going about dealing with removing attachments. @document.assets.detach will nuke ALL attachments associated with that document, @document.essay.assets.detach(@asset) will nuke just that asset you are referencing.


